Customer Split Name
Sometimes you want to capture customer first and last name in the booking widget. You can use customer split name feature to achieve this usecase.
Step-1: Turn on customer name splitting feature
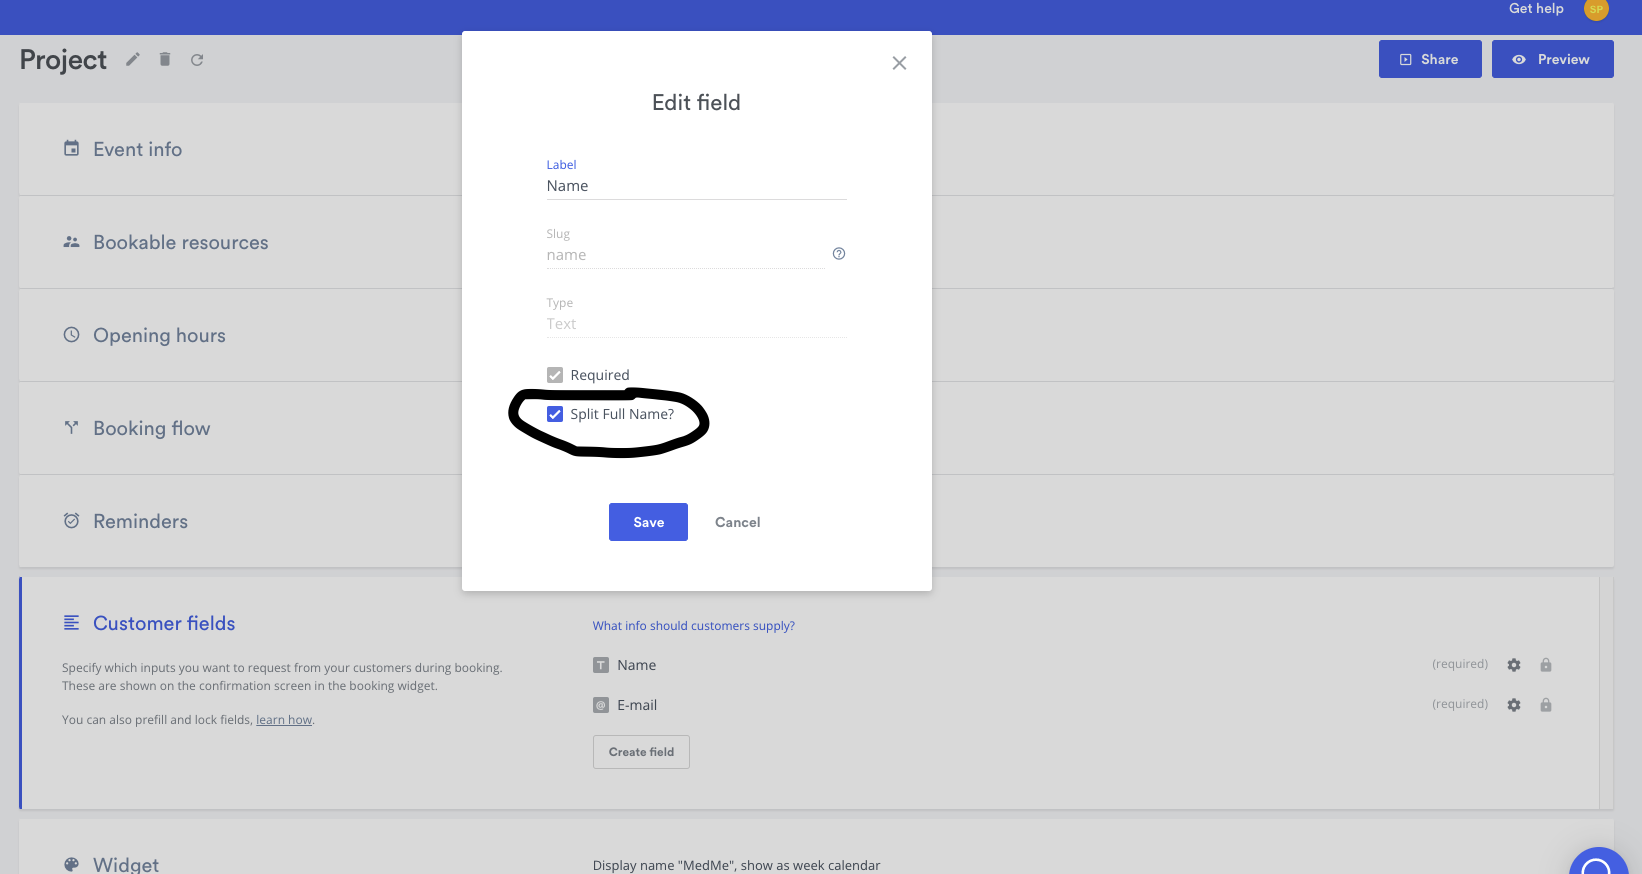
Login to https://admin.timekit.io and go to your project settings. Scroll through cards and find Customer Fields card, click open the card and select setting icon beside name field as seen below.

Step-2: Select "Split Full Name" check box
Once you click on setting icon close to name field it will open following window where you can click on "Split Full Name?" checkbox.
Once this checkbox settings are saved you can go to your booking widget to make sure First/Last Name field appears.
Step-3: Check booking widget for first/last name field
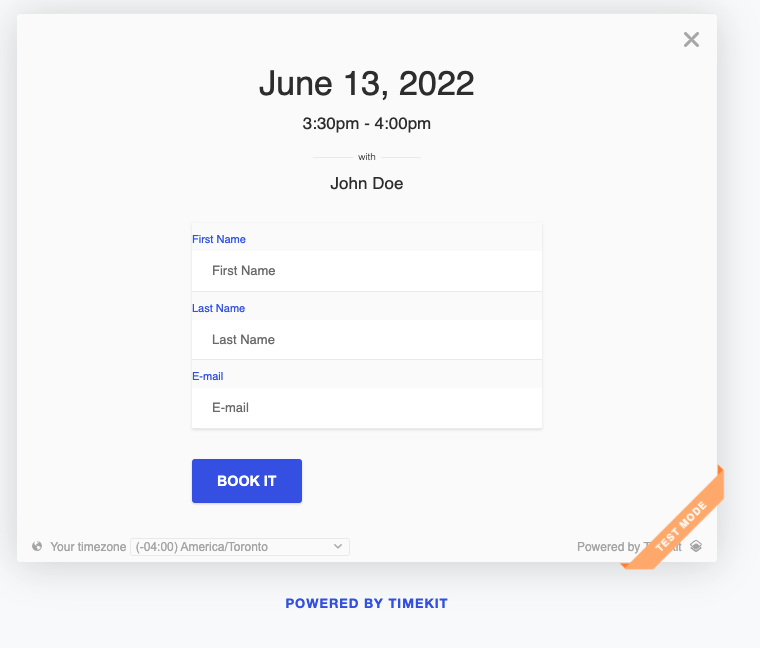
Open booking widget and make sure new fields called First Name and Last Name appears separately instead of Name text field as shown below.
Step-4: Verify booking email with First/Last name
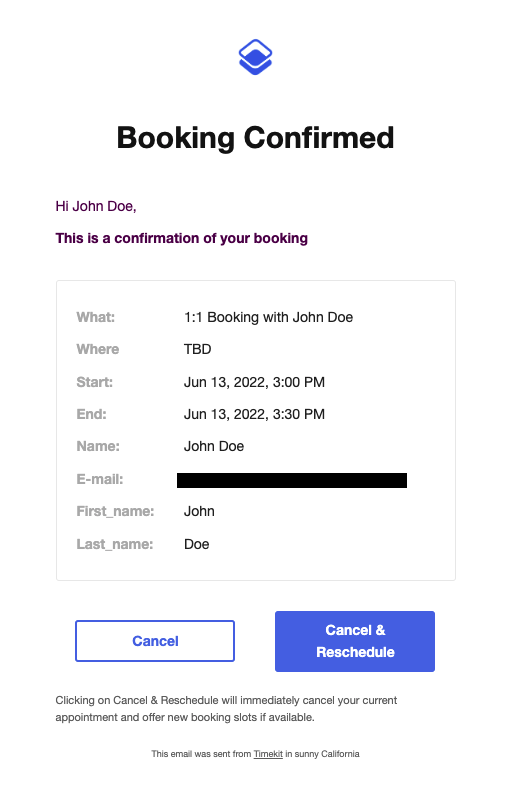
Once you make booking by providing first and last name fields your customer and resource will get an email with new fields i.e. First Name and Last Name as a different fields.
Creating bookings with split names via the API
When the project has "Split Full Name" turned on and you create a booking with POST /bookings and that project's project_id, customer.name becomes optional. Send the first and last name in customer.meta as a JSON-encoded string (not an object) containing first_name and last_name. Both are required. If you leave out customer.name, it is set to the first and last name joined by a space.
json{
  "project_id": "f7df8e1e-f04b-4e3f-9376-ed82b41f4036",
  "resource_id": "d187d6e0-d6cb-409a-ae60-45a8fd0ec879",
  "start": "2030-08-12T21:30:00-07:00",
  "end": "2030-08-12T22:15:00-07:00",
  "customer": {
    "email": "marty.mcfly@timekit.io",
    "meta": "{\"first_name\": \"Marty\", \"last_name\": \"McFly\"}"
  }
}