Creating bookings
This article will walk you through creating bookings via the API
Introduction
This tutorial will walk you through creating a booking with the confirm_decline graph. We assume that you have already created the resource we are about to book, if not take a look at this tutorial.
Creating bookings is done by requesting Timekits /bookings endpoint with a POST and some data defining the booking.
curlcurl --request POST \
  --header 'Content-Type: application/json' \
  --url 'https://api.timekit.io/v2/bookings?include=attributes,calendar,customers,available_actions' \
  --user :live_api_key_7nzvc7wsBQQISLeFSVhROys9V1bUJ1z7 \
  --data '{
    "resource_id": "{id}",
    "graph": "confirm_decline",
    "start": "2018-08-01T08:00:00+00:00",
    "end": "2018-08-01T13:00:00+00:00",
    "what": "A would like to book the DeLorean",
    "where": "Sesame St, Middleburg, FL 32068, USA",
    "description": "Please arrive 10 minutes before you time begin",
    "customer": {
      "name": "Marty McFly",
      "email": "marty.mcfly@timekit.io",
      "phone": "1-591-001-5403",
      "voip": "McFly",
      "timezone": "America/Los_Angeles"
    }
  }'
This will create a new booking.
The "customer" parameter defines who the booker is, as opposed to the booked resource, defined by the "resource_id" parameter. In plain terms the above code is an example of Marty McFly requesting a booking of the DeLorean (which has the id={id}) starting at march 1st 2015 at 8am for 3 hours.
The API will respond with a 201 and a body looking similar to this. The available_actions, attributes, calendar and customers objects are only returned because the request asks for them with include; without it you get the basic booking fields only.
json{
  "data": {
    "id": "58190fc6-1ec0-4ebb-b627-7ce6aa9fc703",
    "graph": "confirm_decline",
    "state": "tentative",
    "completed": false,
    "available_actions": [
      "decline",
      "confirm"
    ],
    "created_at": "2016-02-11T11:58:45+0100",
    "updated_at": "2016-02-11T11:58:47+0100",
    "attributes": {
      "event_info": {
        "start": "2018-08-01T08:00:00+00:00",
        "end": "2018-08-01T13:00:00+00:00",
        "what": "Mens haircut",
        "where": "Sesame St, Middleburg, FL 32068, USA",
        "description": "Please arrive 10 minutes before you time begin"
      }
    },
    "calendar": {
      "id": "c91c5d04-2a57-46c0-ab35-e489dadf132e",
      "name": "My calendar",
      "display_name": "My calendar",
      "description": "Ut adipisci non autem cum ut id.",
      "foregroundcolor": "#25d6be",
      "backgroundcolor": "#ea1cb8",
      "created_at": "2016-02-15T13:21:42+0100",
      "updated_at": "2016-02-15T13:21:42+0100"
    },
    "customers": [
      {
        "id": "a728e860-99c7-4009-8843-7d9ac5d7f53f",
        "name": "Marty McFly",
        "email": "marty.mcfly@timekit.io",
        "phone": "1-591-001-5403",
        "voip": "McFly",
        "timezone": "America/Los_Angeles"
      }
    ]
  }
}
The default behaviour is that Timekit will send a booking request email to the resource once we create a booking. The email will look like this:
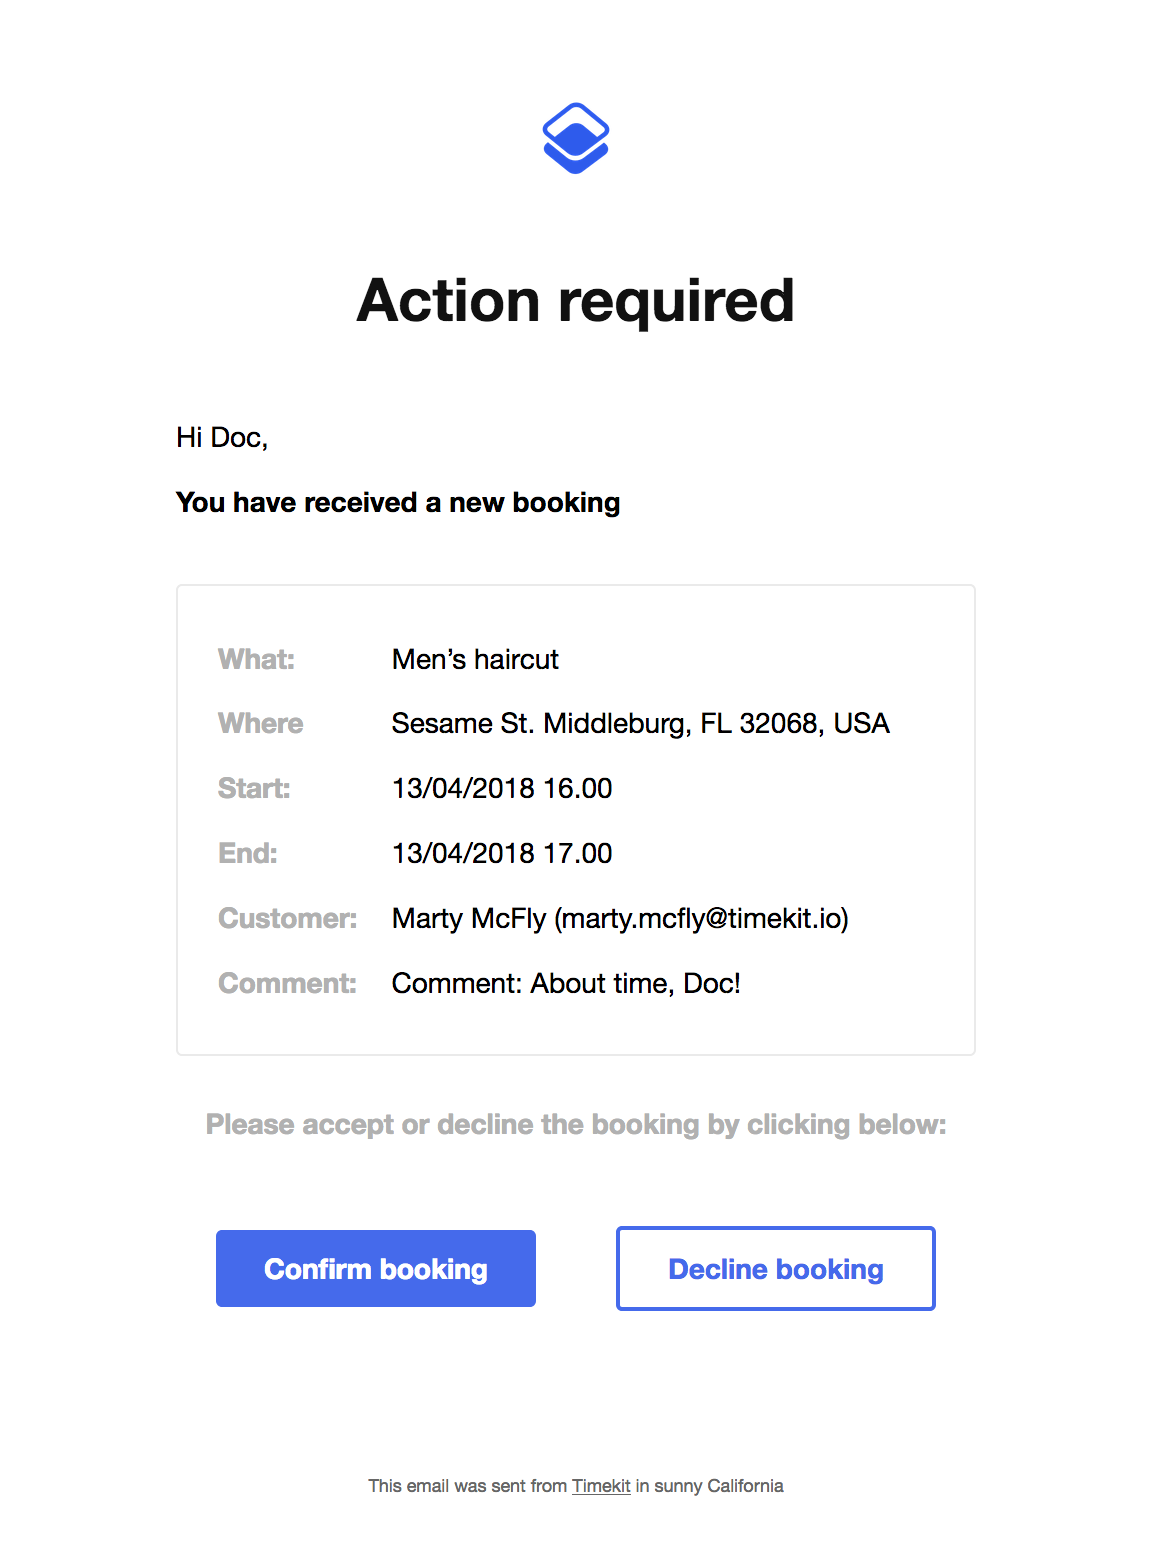
Note that the email contains links for the resource to confirm or decline the booking directly.
You can disable this email by disabling emails in our admin interface, this means that you should handle booking creation yourself through webhooks, but that is a different tutorial.